And now for the exciting conclusion.....
The Iron Warriors Champion, feeling brave leading a ten man squad of marines points his combi-melta at the advancing Wraithlord readying himself for the charge.
The Warpspiders warp right in front of the squad of Havocs and open fire.
The other Wraithlord charges into the Harlequin and Terminator combat.
The Wraithlord charges the marine squad and the Champion challenges. It was a foolish move because instantly the Wraithlord squishes him. The marines attempt to plant grenades on the Wraithlord but are unsuccessful. The marines may have lost combat but they are resolved to finish this and pass their leadership.
The next round of combat comes and goes and the Wraithlord kills a few more marines but they stay stuck in regardless.
The other marines squad snuck behind the combat and opened fire on the Dire Avengers killing a few and forcing them to retreat.
An Iron Warrior activates the control panel. Immediately the lights turn on and night fight is ended. No other effects occur.
The Wraithlord in the central combat swings the balance to the Eldar and kills off the remaining terminator squad. The Chaos Lord is still locked in a challenge with the Farseer and is fearless. The combat continues.
The Eldar advance and the Iron Warriors' numbers are dwindling. The Chaos Marines chances are swiftly going south.
A squad of Wraithguard open a door and slowly shuffle into the central chamber.
The Warpspiders move forward and set their sights on another marine squad.
After shooting and killing several marines, the Warpspiders charge into combat supported by their Autarch.
The marine squad is doomed both literally and figuratively and is wiped to the man.
Meanwhile on the Chaos Marines' left flank a squad of disguised cultists advance hoping to remain hidden from the Eldar's sight to try and grab an objective late game.
A squad of Dire Avengers rounds a corner and spots the cultists. Not a good place to be in if you are a weedy human Chaos Cultist. After the Eldar Bladestorm not a single cultist remains.
A squad of Fire Dragons advance along with the remaining Warp Spiders and Autarch to wipe out another marine squad.
A Warp Spider and his Autarch turn a corner after dispatching a marine squad.
The Wraithlord chases away the remnants of the marine squad but is then gunned down by another marine squad who then advance and take an objective.
The central 3pt objective is held by the Eldar.
The Wraithguard climb up to a high point and take another objective.
At this point the game is over. The Iron Warriors were decimated and the Eldar held the majority of the objectives.
This was the final game I played against the old Eldar codex.
Tomorrow I will play my first game against the new Eldar codex.
Watch for pics and a review of the battle.
Until then.....
Showing posts with label Eye Of Terror Campaign. Show all posts
Friday, June 7, 2013
Wednesday, May 22, 2013
Eye of Terror Campaign: Iron Warriors Vs Craftworld Eldar Game 4 Part 1
This game was based on the Zone Mortalis Encounter Scenario.
Here is a link to the post I made concerning the rules of the scenario: zone mortalis scenario for eye of terror campaign
I had come up with the changes to the scenario on my own based on what I thought would make for an interesting game. The night we decided to play the scenario we both went over what I wrote and decided there may be too many things involved. We cut a few things here and there including mainly the strategems.
We kept the rules for the Control Panels and actually played night fight until one of the panels was activated.
We also kept the end game conditions I laid out which essentially just allowed the game to go until the 8th turn.
We also swapped who would start on the board. The units which arrived from the previous game would arrive before the 1,000pts of units that we created for this game instead of the other way around.
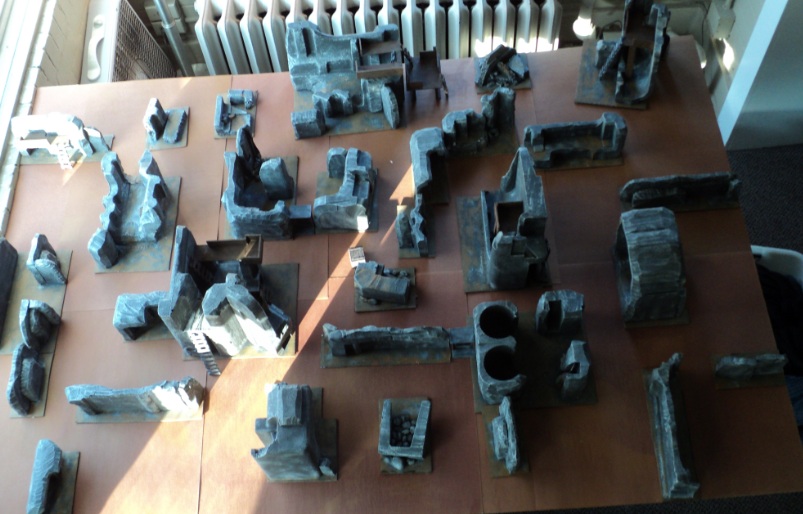
Here is the table layout, I modified it slightly from what I had posted in the scenario post I linked to above.
Several units deploy onto my right flank but just which units those are only I know. (They are the white paper squares in the picture)
An Eldar Wraithlord walks into view of my Havoc squad.
Here you can see the Eldar circular markers and their advance into the caves. The Iron Warriors are receiving blips on their scanners but can't make out which units they are.
This next picture shows the left side of the ballefiled and where some of the objectives are located, note the one on top of the walkway. The central objective is the pile of barrels which is also worth 3 points as opposed to the other ones which are only worth 1 each.
My squads are moving up towards the central line of the board.
The Havoc squad takes some pot shots at the Wraithlord and takes one wound off it.
On the right flank one of the Eldar blips is revealed to be another Wraithlord, the Iron Warrior squad prepares to fire upon it.
The central Wraithlord moves up closing on the central objective.
Two Obliterators move onto the board to lend their fire support to the Havocs'.
A squad of cultists move on and hide behind a wall on the extreme left flank. RIght now they are still disguised as a blip.
A squad of Warp Spiders jump up on the left flank trying to counter any sort of flanking maneuver I may attempt with the cultist squad.
More Eldar reinforcements arrive.
The Iron Warrior squad fires on the Wraithlord to little effect.
Reinforcements arrive to help bolster their mates' shooting.
Close to the center of the board a squad of terminators is revealed along with my chaos lord in terminator armour. They advance and open a door revealing a squad of Harlequins. They then fire their combi-bolters and prepare to charge the Eldar wardancers.
Charging in the Chaos Lord issues a challenge and the Eldar Farseer accepts.
A squad of Striking Scorpions is revealed to be the support unit for the Wraithlord in the center of the table.
The Eldar advance and the central Wraithlord moves to assault into the Terminators.
Behind the Wraithlord on my right flank emerge a squad of Dire Avengers who open up on my Iron Warriors.
Up next is the conclusion of this battle report....
Here is a link to the post I made concerning the rules of the scenario: zone mortalis scenario for eye of terror campaign
I had come up with the changes to the scenario on my own based on what I thought would make for an interesting game. The night we decided to play the scenario we both went over what I wrote and decided there may be too many things involved. We cut a few things here and there including mainly the strategems.
We kept the rules for the Control Panels and actually played night fight until one of the panels was activated.
We also kept the end game conditions I laid out which essentially just allowed the game to go until the 8th turn.
We also swapped who would start on the board. The units which arrived from the previous game would arrive before the 1,000pts of units that we created for this game instead of the other way around.
Here is the table layout, I modified it slightly from what I had posted in the scenario post I linked to above.
Several units deploy onto my right flank but just which units those are only I know. (They are the white paper squares in the picture)
An Eldar Wraithlord walks into view of my Havoc squad.
Here you can see the Eldar circular markers and their advance into the caves. The Iron Warriors are receiving blips on their scanners but can't make out which units they are.
This next picture shows the left side of the ballefiled and where some of the objectives are located, note the one on top of the walkway. The central objective is the pile of barrels which is also worth 3 points as opposed to the other ones which are only worth 1 each.
My squads are moving up towards the central line of the board.
The Havoc squad takes some pot shots at the Wraithlord and takes one wound off it.
On the right flank one of the Eldar blips is revealed to be another Wraithlord, the Iron Warrior squad prepares to fire upon it.
The central Wraithlord moves up closing on the central objective.
Two Obliterators move onto the board to lend their fire support to the Havocs'.
A squad of cultists move on and hide behind a wall on the extreme left flank. RIght now they are still disguised as a blip.
A squad of Warp Spiders jump up on the left flank trying to counter any sort of flanking maneuver I may attempt with the cultist squad.
More Eldar reinforcements arrive.
The Iron Warrior squad fires on the Wraithlord to little effect.
Reinforcements arrive to help bolster their mates' shooting.
Close to the center of the board a squad of terminators is revealed along with my chaos lord in terminator armour. They advance and open a door revealing a squad of Harlequins. They then fire their combi-bolters and prepare to charge the Eldar wardancers.
Charging in the Chaos Lord issues a challenge and the Eldar Farseer accepts.
A squad of Striking Scorpions is revealed to be the support unit for the Wraithlord in the center of the table.
The Eldar advance and the central Wraithlord moves to assault into the Terminators.
Behind the Wraithlord on my right flank emerge a squad of Dire Avengers who open up on my Iron Warriors.
Up next is the conclusion of this battle report....
Labels: Introduction
battle report,
Eye Of Terror Campaign,
Iron Warriors
Sunday, February 10, 2013
Zone Mortalis Scenario for Eye of Terror Campaign
In the previous game The Eldar and Iron Warriors were in a race to the underground tunnel system under the Daemon World Eidolon. The units which got underground will be added to 1,000 point forces with standard force org for this scenario.
I set up the board and took a picture since I won't be able to play this game right now, I wanted to take a picture so I could set it back up again when I do play this game.
This scenario is based on the Zone Mortalis rules which are available for free on the Forgeworld Website Here.
It is a modified Encounter Mission. I hesitate to post any Forgeworld rules here so I recommend you download the pdf and refer to it as you read through the scenario here.
As this is an Encounter Mission the deployment is as described in the pdf. Reserves will be used but only for the units which are added to the 1,000 points from the previous game. Those extra units start in reserves.
Scoring units are identical to those listed in the pdf.
The objectives are as follows: One in the center worth 3pts. And 6 additional objectives which will be alternately placed by each player which will be worth 1pt each. Slay the Warlord, First Blood and Linebreaker will be secondary objectives each worth 1 pt.
All of the regular Zone Mortalis rules will be in effect.
This means that the following rules are in effect: Deadly Ground, No Barrage Weapons, Terrain Effects by Unit Types, Objectives in Zone Mortalis(these objectives are NOT mysterious), Reserves and Deep Striking, Firestorm & Shrapnel, Nowhere to Hide, Blind Panic and Reaction Fire.
There are Doors in this scenario, they are Accessible and can be Destroyed.
Of the Optional rules only Attrition and Enemy Unknown are in effect.
The following Strategems may be used (following the normal ways of purchasing them detailed in the Zone Mortalis rules and either player can buy any of the following): Interdiction Assault, Sustained Assault, Barricades and Traps
Control Panels -
There are two control panels which look like this:
To use these panels a model must, at the end of the phase, be in base contact with the panel. The model may then make a Leadership Check using its Leadership (meaning if a basic Marine is in contact it uses its leadership instead of the Sergeants). If the test is passed, then immediately the controlling player must roll 2d6 and consult the Catastrophic Damage Table the effects of that table then are immediately applied.
NOTE that while it could be used at the end of the close combat phase if a model is in base with it, the panels may not be assaulted in the assault phase.
Also these panels may only be used ONCE in a player turn.
This mission uses random game length but you roll for the game to end after turn 6. If a 4+ is rolled the game continues to turn 7. After turn 7 roll again. If a 4+ is rolled the game continues to turn 8 after which the game will end.
This game does not use Nightfight unless both players agree to it. If both players agree to using night fight then Nightfighting is in effect until one player uses one of the panels, then it immediately ends.
Can't wait to play the game...until then.
I set up the board and took a picture since I won't be able to play this game right now, I wanted to take a picture so I could set it back up again when I do play this game.
This scenario is based on the Zone Mortalis rules which are available for free on the Forgeworld Website Here.
It is a modified Encounter Mission. I hesitate to post any Forgeworld rules here so I recommend you download the pdf and refer to it as you read through the scenario here.
As this is an Encounter Mission the deployment is as described in the pdf. Reserves will be used but only for the units which are added to the 1,000 points from the previous game. Those extra units start in reserves.
Scoring units are identical to those listed in the pdf.
The objectives are as follows: One in the center worth 3pts. And 6 additional objectives which will be alternately placed by each player which will be worth 1pt each. Slay the Warlord, First Blood and Linebreaker will be secondary objectives each worth 1 pt.
All of the regular Zone Mortalis rules will be in effect.
This means that the following rules are in effect: Deadly Ground, No Barrage Weapons, Terrain Effects by Unit Types, Objectives in Zone Mortalis(these objectives are NOT mysterious), Reserves and Deep Striking, Firestorm & Shrapnel, Nowhere to Hide, Blind Panic and Reaction Fire.
There are Doors in this scenario, they are Accessible and can be Destroyed.
Of the Optional rules only Attrition and Enemy Unknown are in effect.
The following Strategems may be used (following the normal ways of purchasing them detailed in the Zone Mortalis rules and either player can buy any of the following): Interdiction Assault, Sustained Assault, Barricades and Traps
Control Panels -
There are two control panels which look like this:
To use these panels a model must, at the end of the phase, be in base contact with the panel. The model may then make a Leadership Check using its Leadership (meaning if a basic Marine is in contact it uses its leadership instead of the Sergeants). If the test is passed, then immediately the controlling player must roll 2d6 and consult the Catastrophic Damage Table the effects of that table then are immediately applied.
NOTE that while it could be used at the end of the close combat phase if a model is in base with it, the panels may not be assaulted in the assault phase.
Also these panels may only be used ONCE in a player turn.
This mission uses random game length but you roll for the game to end after turn 6. If a 4+ is rolled the game continues to turn 7. After turn 7 roll again. If a 4+ is rolled the game continues to turn 8 after which the game will end.
This game does not use Nightfight unless both players agree to it. If both players agree to using night fight then Nightfighting is in effect until one player uses one of the panels, then it immediately ends.
Can't wait to play the game...until then.
Labels: Introduction
Eye Of Terror Campaign,
Zone Mortalis
Friday, February 1, 2013
Eye Of Terror Campaign: Iron Warriors Vs Eldar Craftworld Antares Game 3 Part 2
Part 2 of this battle report begins with the Eldar Wraithlord moving into the central access hatch.
The Striking Scorpions move through the ruins and assault the Rhino using their Strength of 4.
No grenades are needed to destroy the Iron Warrior's transport. And only half of the squad escapes alive.
Meanwhile in the center of the board, the second Iron Warrior squad moves onto the central objective and descends into the dark underground.
The survivors of the blown up rhino attempt to make a dash for it but trip over their own feet and don't quite make the elevator.
The other Iron Warriors continue to converge on both the Eldar and the central objective.
The raptors move in to assault the Wraithlord.
The raptors charge and whiff against the Eldar construct,it promptly swings back and kills two.
While the Raptors and Wraithlord are duking it out, the Harlequins sneak on the the objective.
Shortly after the Harlequins hop down the hole, the Dire Avengers behind them open fire on the 20 man squad of cultists reducing them to only 3.
The Vindicator then rotates and spots the Dire Avengers through the forest and fires.
The Dire Avengers take hideous casualties from a direct hit!
The Helbrute, continuously enraged by being shot at multiple turns in a row finally gets its revenge and blows the Wave Serpent to bits.
Another marines squad closes on the central objective along with a Havoc squad, they fire on the last two Dire Avengers and eliminate them.
Suddenly the other Wraithlord stomps the final two raptors and consolidates towards the objective. The during his movement phase he moves onto the objective right in front of two Iron Warriors squads who are helpless to stop it.
The Eldar pathfinders size up their prey.
They take aim and fire! Killing the final two members of a squad who almost made it to the elevator shaft.
The Havoc squad moves onto the central objective.
The end of the game on turn 6, two squads don't quite make it.
We rolled for turn 7 and the game ended at the end of 6. Final count: Eldar 4 units (2 Wraithlords, Striking Scorpions, Harlequins) Iron Warriors 3 units (10 marines with Autocannon and plasma gun champ with powersword, 10 marines missile launcher and flamer and champ with melta bombs, and 7 havocs with 4 autocannons)
My units that escaped were a total of 486 points.
I am not sure the point totals of the Eldar units but I feel they may have a slight edge.
Either way the Eldar won this scenario because they had more units than I did make it into the tunnels.
The next mission I will detail here soon. It will be a modified Zone Mortalis mission. I can't wait to sit down and make the scenario and I can't wait till the next game.
Until then...
The Striking Scorpions move through the ruins and assault the Rhino using their Strength of 4.
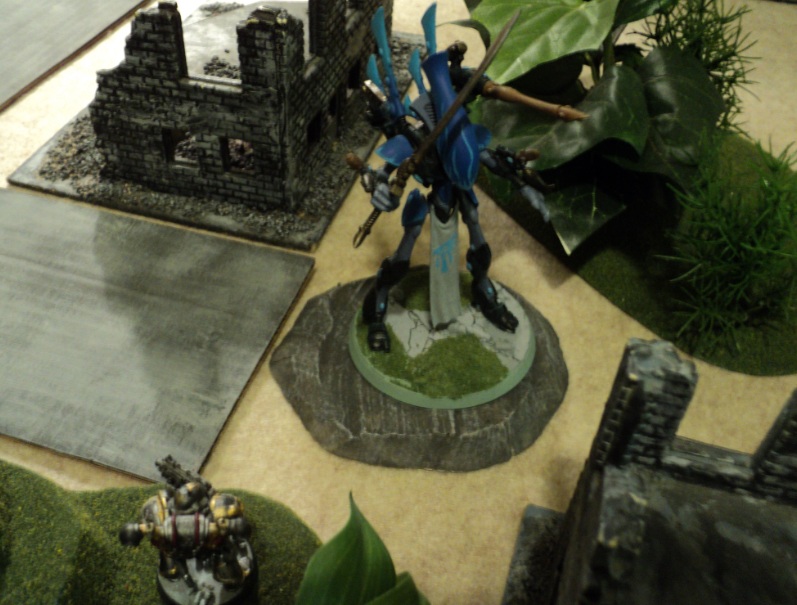
No grenades are needed to destroy the Iron Warrior's transport. And only half of the squad escapes alive.
Meanwhile in the center of the board, the second Iron Warrior squad moves onto the central objective and descends into the dark underground.
The survivors of the blown up rhino attempt to make a dash for it but trip over their own feet and don't quite make the elevator.
The other Iron Warriors continue to converge on both the Eldar and the central objective.
The raptors move in to assault the Wraithlord.
The raptors charge and whiff against the Eldar construct,it promptly swings back and kills two.
While the Raptors and Wraithlord are duking it out, the Harlequins sneak on the the objective.
Shortly after the Harlequins hop down the hole, the Dire Avengers behind them open fire on the 20 man squad of cultists reducing them to only 3.
The Vindicator then rotates and spots the Dire Avengers through the forest and fires.
The Dire Avengers take hideous casualties from a direct hit!
The Helbrute, continuously enraged by being shot at multiple turns in a row finally gets its revenge and blows the Wave Serpent to bits.
Another marines squad closes on the central objective along with a Havoc squad, they fire on the last two Dire Avengers and eliminate them.
Suddenly the other Wraithlord stomps the final two raptors and consolidates towards the objective. The during his movement phase he moves onto the objective right in front of two Iron Warriors squads who are helpless to stop it.
The Eldar pathfinders size up their prey.
They take aim and fire! Killing the final two members of a squad who almost made it to the elevator shaft.
The Havoc squad moves onto the central objective.
The end of the game on turn 6, two squads don't quite make it.
We rolled for turn 7 and the game ended at the end of 6. Final count: Eldar 4 units (2 Wraithlords, Striking Scorpions, Harlequins) Iron Warriors 3 units (10 marines with Autocannon and plasma gun champ with powersword, 10 marines missile launcher and flamer and champ with melta bombs, and 7 havocs with 4 autocannons)
My units that escaped were a total of 486 points.
I am not sure the point totals of the Eldar units but I feel they may have a slight edge.
Either way the Eldar won this scenario because they had more units than I did make it into the tunnels.
The next mission I will detail here soon. It will be a modified Zone Mortalis mission. I can't wait to sit down and make the scenario and I can't wait till the next game.
Until then...
Labels: Introduction
battle report,
Eldar,
Eye Of Terror Campaign,
Iron Warriors
Subscribe to:
Posts (Atom)