A week ago I got to play my second game of HH 2.0. We played a 2500pt game just like the first time but this time we both took very different lists.
My Iron Warriors Army list was approximately as follows:
HQ -
Warsmith Martok - Servo Arm, Master-Crafted Paragon Blade, Plasma Pistol, Meltabombs
Warlord Trait: Tyrant of the Dodekathon
Rite of War: Hammer of Olympia
Master of Signal - Chainsword and bolt Pistol
Elites -
3 Iron Circle Automata
2 Apothecaries
5 Destroyers with jump packs
Troops -
20 Tactical Marines with Legion Vexilla and Shrapnel Bolters
20 Tactical Marines with Legiuon Vexilla and Shrapnel Bolters
10 Tactical Marines with Shrapnel Bolters in a Rhino
5 Tactical Support Marines with Plasma guns in Rhino
Fast Attack -
6 Seekers with combi-plasma in Rhino
Heavy Support -
Heavy Support Squad - 9 Lascannons
Whirlwind Scorpius
Night Lords army list:
HQ -
Praetor in Cataphracti Armor
4 Cataphracti Terminators Command Squad
Elites -
2 Rapier Quad Launchers
4 Apothecaries
Troops -
10 Tactical Marines
10 Tactical Marines in Rhino with Havoc Launcher
10-man Terror Squad
10-man Terror Squad
10-man Terror Squad
Fast Attack -
Xiphon Interceptor
Heavy Support -
Land Raider Phobos
Heavy Support Squad 7 Missile Launchers
The Deployment Type we rolled up was Clash of the line and the mission was Onslaught.
The Night Lords had the first turn and decided that it would be Night Fight.
We both tried to take different armies than we usually take and we did this without talking to each other beforehand about doing so. I think we both tried to play to the meta that we have created between our two armies.
We have been playing Heresy together for almost the entirety of Horus Heresy as a system existing so we both kind of know what the other person is going to bring usually.
My army is usually 2 large 20 man squads backed up by lots of tanks and the Tyrant Siege Terminators.
His army is usually lots of terror squads backed up by maybe one long range heavy vehicle and some deepstriking units.
We both put together armies that don't fit that in the above descriptions.
I thought that he wouldn't be playing many vehicles so I took out a lot of the long range anti-tank weapons and tanks that I usually take and took a lot more anti-infantry / anti-heavy infantry units.
He put in more long range firepower and added long range anti-tank and no deepstriking units.
We both kind of out-metaed eachother! It was a pretty neat thing to see, IMHO.
Here is a picture of his deployment zone:
Here is my deployment Zone:
You can see he infiltrated 2 Terror Squads on the flanks and a Terror Squad in the middle.
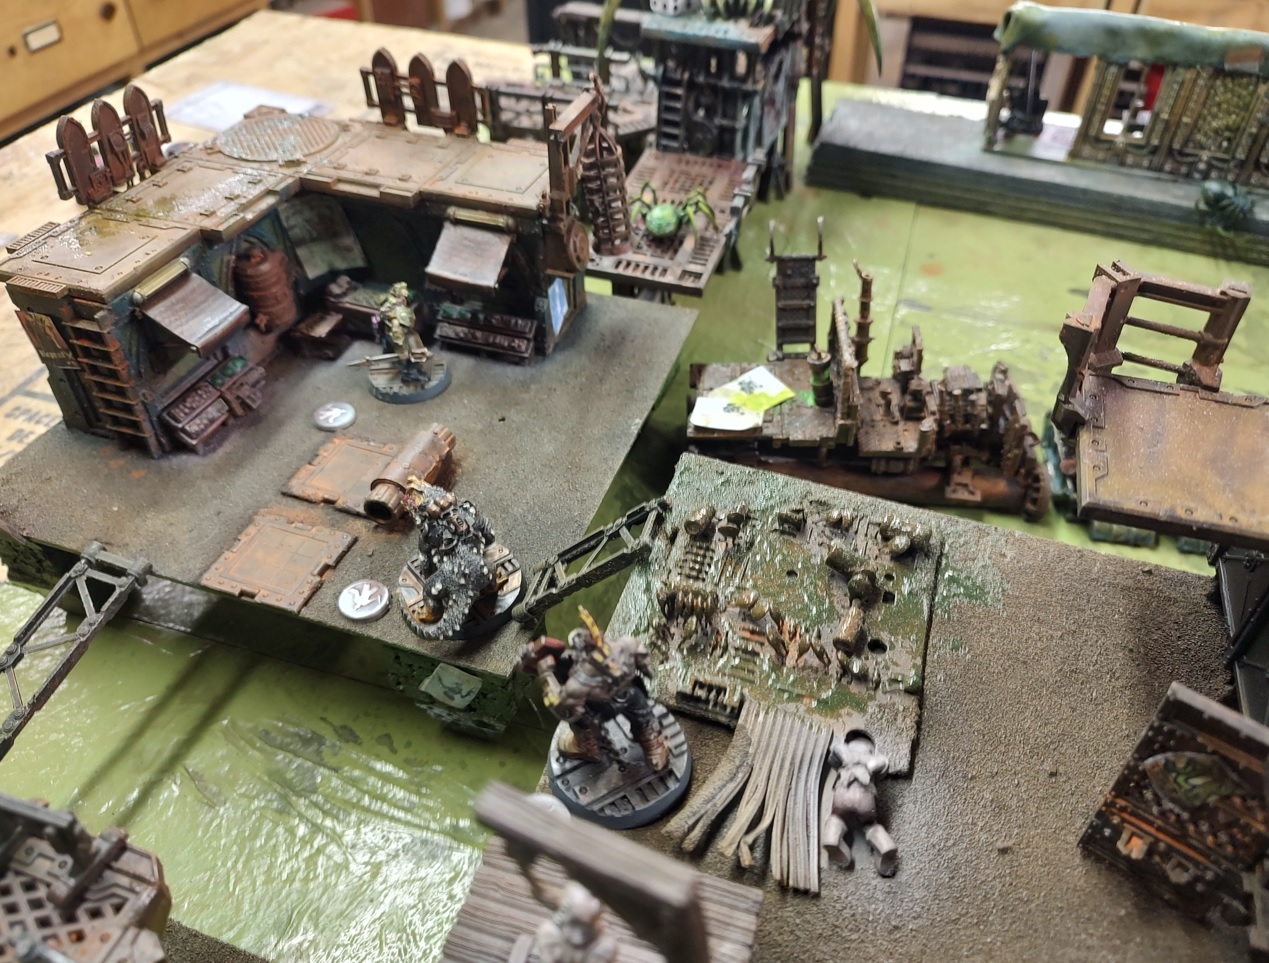
Here is a picture of most of the board as a whole:
On the left in the ruins you can see the second Terror Squad mentioned above.
I deployed my Heavy Support Squad and attached my Master of Signals in
the ruins in the forest. Behind them I deployed my Whirlwind Scorpius.
I could have deployed the Whirlwind on the other flank behind the hill and I probably
should have done so but I figured this deployment blocked line of sight better.
His Heavy Support Squad was deployed right behind the central large piece of terrain
(the ruins in the forest) with the intention of moving up into those
ruins to get good shots in future turns.
The Land Raider and two marines squads; one mounted in the rhino and one on foot,
would move up and provide a second wave of close support shooting and close
combat in the later half of the game.
His Terror Squads shoot up my large 20 man squads on his turn one but don't do too much damage. I begin to maneuver to take them out starting in the bottom of turn 1.
I deploy my tactical squad from their rhino to attack and block off
the Terror Squad on my right flank.
My Iron Circle, Destroyer Squad and Tactical Support Squad move up to
counter the Terror Squad on my left Flank.
He unleashed mass amounts of firepower into my central 20 man tactical
squad reducing it to half strength by the time my turn 2 came around.
I attempted to move it forward to engage the Night Lords tactical squad.
The Terror Squad shot at and then charged into my Tactical Support Squad and
eliminated them in short order.
My central 20-man squad is brought low by his central Terror Squad.
My 10-man Tactical squad on my right flank breaks and runs away. Luckily I
was able to pin his Terror Squad giving me another turn to deal with them.
My Destroyer Squad moves in to respond to the central Terror Squad and a
Phosphex Bomb, two Hand Flamers, and multiple Pistol Shots later, they
despatch the Terror Squad.
On my left flank the Iron Circle make short work of the other Terror Squad.
Not to be outdone by a legion not known for their close combat prowess, the
Night Lords Praetor makes an appearance disembarking from his Land Raider
and preparing to slice and dice some Iron Warriors.
As a Reaction, my Destroyers back up and he fails his charge. The end of the game
is fast approaching and neither of us have much left on the table. By the end
we would each only have a few models alive.
I attempt to charge his Land Raider with the Iron Circle and he uses his
Legion Reaction and the Land Raider moves back and out of range of a charge.
The Xiphon flies in and almost takes out the Whirlwind Scorpius.
With a hail of gunfire the Iron Warriors end up shooting the Night Lords
Terminators and Praetor off the table.
Now with the game on the line, the last Night Lords Tactical squad moves up to take the objective.
The Iron Warriors now need to concentrate fire to have a chance to win this battle.
After firing basically everything that the Iron Warriors had left at that last tactical squad they killed it and were able to prevent the Night Lords from taking the Objective.
At the end, neither the Iron Warriors nor the Night Lords controlled an objective. We tied on the Attrition objective; we each killed the same number of units.
The finial score was Iron Warriors 1 and Night Lords 0. I had killed his Warlord and my Warlord was still alive.
The following are some thoughts on the game.
I used the Warlord trait to eliminate cover in the forest on my right flank and I should have used it on the main ruins in the forest in the middle of the board instead. It would have really messed with his plan on advancing into the center and using it as a base for his heavy weapon squad.
Our first game was over before the 5th turn but this game went the whole 6 turns the scenario called for.
One of the things I kept doing was thinking and re-thinking what reactions I should use and when I should use them. I also kept tryin to figure out which ones my opponent was going to use, where he was going to use them and when. I was thinking about them so much that I missed obvious opportunities and also I started forgetting whose turn it was, what phase it was and which units I had shot and which units I hadn't shot yet.
Reactions add almost an entire new phase each turn. There is so much additional possibilities with reactions that they could completely change a game and used properly could actually be the determining factor in many games.
Which army you play with and the composition of that may even be less important than understanding what Reactions you have available to you and when and where to apply them to get the best results.
Horus Heresy 2.0 is truly a different game than 1.0.
The following are some thoughts on my army composition.
I only took 2 heavy support units which in hindsight was probably wrong. The Iron Warriors' strengths are their shooting. I should always lean into the long range heavy firepower especially a unit such as the Siege Tyrant Terminators since in this game they could have shot at the Xiphon and they can ignore Night Fight. I could probably almost shoot an entire enemy unit off the board each turn with them but without them I struggled to finish off units with shooting. Siege Tyrants also ignore Night Fight.
I also think taking multiple Predator tanks is a good idea. I have two right now and I am working on a 3rd. I may even pick up a new one at some point. Predators really do provide a great amount of long range fire for not very much points.
The Scorpius I still think is a great artillery piece and I intend to continue taking it in most lists, having two in a squad may even be something I think about in the future.
The Iron Circle are worth taking now that they are cheaper but I am not sure I would take them again in a game this small. They need more than 1 to be effective and then you also need to have a model with a Cognis Signum join them to control them or they are just not reliable. I think I will save them for really big games from now on like in 1.0.
The Destroyers and Seekers were OK but not great. I am not sure about taking them again in the future. The Tactical Support squad didn't get a chance to do anything. I should have used a shooting reaction with them to shoot up the nearby Terror Squad but I did not because I forgot.
The 20 man marines squads I am not sold on right now. I want to try an army with 4 ten man squads in rhinos with havoc launchers instead and see how that goes.
I need to be able to be more mobile. I didn't get anywhere near the other objective. I spent all game on the defensive.
I think I need to try and cram in some Land Raiders into my army.
Well this was the bat rep and those were my thoughts.
Until next time..