Sunday, February 10, 2013

Zone Mortalis Scenario for Eye of Terror Campaign

In the previous game The Eldar and Iron Warriors were in a race to the underground tunnel system under the Daemon World Eidolon.  The units which got underground will be added to 1,000 point forces with standard force org for this scenario.

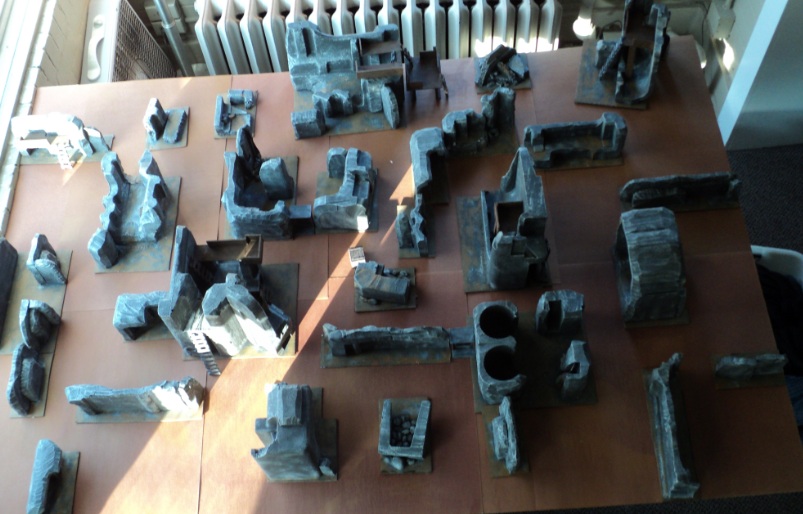
I set up the board and took a picture since I won't be able to play this game right now, I wanted to take a picture so I could set it back up again when I do play this game.


This scenario is based on the Zone Mortalis rules which are available for free on the Forgeworld Website Here.

It is a modified Encounter Mission.  I hesitate to post any Forgeworld rules here so I recommend you download the pdf and refer to it as you read through the scenario here.

As this is an Encounter Mission the deployment is as described in the pdf.  Reserves will be used but only for the units which are added to the 1,000 points from the previous game.  Those extra units start in reserves.

Scoring units are identical to those listed in the pdf.

The objectives are as follows:  One in the center worth 3pts.  And 6 additional objectives which will be alternately placed by each player which will be worth 1pt each.  Slay the Warlord, First Blood and Linebreaker will be secondary objectives each worth 1 pt.

All of the regular Zone Mortalis rules will be in effect.
This means that the following rules are in effect: Deadly Ground, No Barrage Weapons, Terrain Effects by Unit Types, Objectives in Zone Mortalis(these objectives are NOT mysterious), Reserves and Deep Striking, Firestorm & Shrapnel, Nowhere to Hide, Blind Panic and Reaction Fire.

There are Doors in this scenario, they are Accessible and can be Destroyed.

Of the Optional rules only Attrition and Enemy Unknown are in effect.

The following Strategems may be used (following the normal ways of purchasing them detailed in the Zone Mortalis rules and either player can buy any of the following): Interdiction Assault, Sustained Assault, Barricades and Traps

Control Panels -

There are two control panels which look like this:


To use these panels a model must, at the end of the phase, be in base contact with the panel.  The model may then make a Leadership Check using its Leadership (meaning if a basic Marine is in contact it uses its leadership instead of the Sergeants).  If the test is passed, then immediately the controlling player must roll 2d6 and consult the Catastrophic Damage Table the effects of that table then are immediately applied.

NOTE that while it could be used at the end of the close combat phase if a model is in base with it, the panels may not be assaulted in the assault phase.

Also these panels may only be used ONCE in a player turn.

This mission uses random game length but you roll for the game to end after turn 6.  If a 4+ is rolled the game continues to turn 7.  After turn 7 roll again.  If a 4+ is rolled the game continues to turn 8 after which the game will end.

This game does not use Nightfight unless both players agree to it.  If both players agree to using night fight then Nightfighting is in effect until one player uses one of the panels, then it immediately ends.

Can't wait to play the game...until then.

New Blogs and Podcasts

I have found several new blogs and podcasts recently that I added to my blog list and podcast list.

The first one I want to mention is Realm of Chaos: An 80s Warhammer Enthusiast Blog This one is pretty cool.  There is an interview with Rick Priestly and also one with Bryan Ansell.  Rick Priestly of course created Warhammer 40k and Bryan Andell was the owner of GW back in the 80s.

Another blog in my blog list is Squat on My Smiley Face.  This is a blog all about Squats and this guy's journey into making a Squat army.  He recently acquired a huge lot of old Squat figs.

Forgeworld Only is a cool blog devoted to armies created entirely with Forgeworld models.  There are some very beautiful things here and you guys should check it out.

The Road to the Black Library is a blog dedicated to Chaos, both list building and miniatures mainly focused on Ahriman and the Thousand Sons.  Definitely some cool stuff here.

Turn 8 is a podcast I have recently found.  I think these guys do a darn good job.  There is minimal messing around and they cover some pretty cool topics and have a neat twist on battle reports.  After listening to them for awhile now, I can get "next" out of my mind.  You will have to listen to them to get what I mean.

Chaos of the Warp is another podcast I just stumbled onto.  These are some guys from across the pond in England.   Episode 43 has an interview with Rick Priestly. The audio quality could be better and you can only download the episodes through itunes, but it is a pretty good listen.

All of the above are highly recommended to check out.

Soon I will have a new scenario I am working on for a Zone Mortalis game.

Until then...

Friday, February 1, 2013

Eye Of Terror Campaign: Iron Warriors Vs Eldar Craftworld Antares Game 3 Part 2

Part 2 of this battle report begins with the Eldar Wraithlord moving into the central access hatch.


The Striking Scorpions move through the ruins and assault the Rhino using their Strength of 4.


No grenades are needed to destroy the Iron Warrior's transport.  And only half of the squad escapes alive.


Meanwhile in the center of the board, the second Iron Warrior squad moves onto the central objective and descends into the dark underground.


The survivors of the blown up rhino attempt to make a dash for it but trip over their own feet and don't quite make the elevator.


The other Iron Warriors continue to converge on both the Eldar and the central objective.


The raptors move in to assault the Wraithlord.


The raptors charge and whiff against the Eldar construct,it promptly swings back and kills two.


While the Raptors and Wraithlord are duking it out, the Harlequins sneak on the the objective.


Shortly after the Harlequins hop down the hole, the Dire Avengers behind them open fire on the 20 man squad of cultists reducing them to only 3.


The Vindicator then rotates and spots the Dire Avengers through the forest and fires.


The Dire Avengers take hideous casualties from a direct hit!


The Helbrute, continuously enraged by being shot at multiple turns in a row finally gets its revenge and blows the Wave Serpent to bits.


Another marines squad closes on the central objective along with a Havoc squad, they fire on the last two Dire Avengers and eliminate them.


Suddenly the other Wraithlord stomps the final two raptors and consolidates towards the objective.  The during his movement phase he moves onto the objective right in front of two Iron Warriors squads who are helpless to stop it.


The Eldar pathfinders size up their prey.


They take aim and fire! Killing the final two members of a squad who almost made it to the elevator shaft.


The Havoc squad moves onto the central objective.


The end of the game on turn 6, two squads don't quite make it.


We rolled for turn 7 and the game ended at the end of 6.  Final count: Eldar 4 units (2 Wraithlords, Striking Scorpions, Harlequins) Iron Warriors 3 units (10 marines with Autocannon and plasma gun champ with powersword, 10 marines missile launcher and flamer and champ with melta bombs, and 7 havocs with 4 autocannons)

My units that escaped were a total of 486 points.

I am not sure the point totals of the Eldar units but I feel they may have a slight edge.

Either way the Eldar won this scenario because they had more units than I did make it into the tunnels.


The next mission I will detail here soon.  It will be a modified Zone Mortalis mission.  I can't wait to sit down and make the scenario and I can't wait till the next game.

Until then...