A few weeks ago the new map campaign kicked off with a Big Bar Brawl. The Big Bar Brawl mission is in the House Of Iron book. It expands on the smaller scope of the Bar Brawl mission which was in a White Dwarf supplement from a few years ago.
The Big Bar Brawl mission modifies the basic game structure by changing the phases of the game; there is a Drinking Phase followed by a Fighting Phase followed by the End Phase. We also only allowed four fighters from each gang because we played a 4 player game and didn't want the game to drag out for multiple hours, which is possible if we used the whole gangs in the mission instead of just 4.
I took Rad, Angelica, Bull and Krak to the Red Robin Bar.
We played on a small 2' x 2' table. The Red-Arsed Monkeys (Goliaths) got hosed by both The House of Xtravaganza (Escher) and the Chaos Cult gang while the Iron Angels (my Orlock gang) picked and chose their fights eventually being the last gang standing and having taken no real lasting damage. Also by the end of the game, the Iron Angels had taken a Goliath captive.
Coming out of the Big Bar Brawl feeling very good about themselves, Angelica and crew prepared for the Goliaths to come and try to rescue their komrad. The Goliath captive was taken and being held in the Iron Angel's 3-story prison complex in the Sump Sea zone which is controlled by Angelica's cousin, Duke Tuffnow.
The Sump Sea sector has many industrial, living quarters, and ruins set upon large rockcrete slabs which sit on the surface of the Sump Sea. The slabs are held up not only by immense columns sunk into the sea floor but also horizontally by rebar-supported rockcrete beams and joists. This makes the Sump Sea area similar the Old Earth's Venice. One of the main differences between Venice and the Sump Sea is that the Sump Sea is much deadlier. A fall into the Sump Sea could easily mean death for an unfortunate Hiver.
The Sump Sea sector.
The mission was Rescue. The Orlocks set the Goliath prisoner in the second floor of their prison tower and set 5 ganger sentries to patrol the perimeter of the area.
The captive.
Sentry #1: Xak Frakker
Sentry #2: Zeb MacAfee
Sentry #3: Fill Maroney
Sentry #4: Krak Frakker
Sentry #5: Val Valentino
Val Valentino isn't aware of the danger he is in. The Goliath leader and his Sump Croc pet have snuck into position to take out Val.
Val Valentino is about to get ambushed.
A Goliath ganger eyeing Fill Maroney from behind a wall.
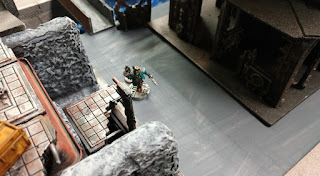
The rest of the Goliaths move into position and begin to sneak around, trying to be as quiet as possible.
Krak Frakker randomly saunters down a corridor and spots a Goliath.
Krak fires on the Goliath and unfortunately doesn't do much. Krak then sets off the alarm and all of the Orlocks now realize they are in trouble.
Knowing Krak is in trouble, he retreats down a corridor, hoping he can escape the Goliaths.
The Orlock reserves start to show up but unfortunately a great number of them show up in awkward places unable to assist in the battle at all.
Angelica and Bull apparently took a wrong turn....
Fio Tuffnow arrives and starts up her jump pack engines ready for a big jump.
Val does his best to avoid the monster of a Goliath and his pet Croc but he just can't, and he goes down.
Fill Maroney fires his Combat Shotgun and a hail of scattershot bowls over a Goliath.
One of the Goliath's tries to block future shots from Fill by throwing a smoke
grenade but the smoke cloud drifts back on top of him.
Fill Maroney gets charged by a Goliath ganger and he holds his ground.
He is joined shortly there after by Fio with her jump pack.
Fio has 3 attacks, hitting on 3s. She rolls 1's. I had a lot of rolls like this in this game.
Krak Frakker goes down to a massive axe-wielding Goliath.
At this point, two gangers were out-of-action and a third was facedown with a serious injury. Four of the Orlock reserves were in a spot where they couldn't contribute to the battle. The Goliath captive had even busted his bonds and escaped! At this point Angelica had had enough, she called off the gang and voluntarily bottled and the Iron Angels retreated out of the area.
Val Valentino recovered from his wounds and will be back in the next fight. Krak Frakker had to go to the Doc but was patched up for 90 credits. Krak was worth only 80 credits but he had 3 experience points so it was worth it to get him fixed up. Fio who was the seriously injured ganger recovered just fine.
After going to the Doc to get Krak fixed up Angelica went to the Trading Post to purchase an Armored Undersuit. Her save goes up to 4+. The other upgrade I want to get as soon as possible is the Suspensors for Rad Gruffhouse's Heavy Bolter.
The fact that the Goliaths came into Orlock territory and rescued one of their own didn't sit well with Duke Tuffnow. He was angered that these uncouth beasts could just waltz into his territory and take what was rightfully his cousin's prize. The money the captive could have been worth to the guilders was significant and the loss of that income bothered Duke.
The Red-Arsed Monkeys had to be stopped. They would not be allowed to leave The Tuffnow's Territory "Zone 1" without paying a price.
Duke began formulating a plan that revolved around the Ruins, a Beastman, and enough autogun rounds to make a screen door out of a bulkhead.
The plan revealed, next time.....


No comments:
Post a Comment